
So you all know I shared with you last post that I have a new camera to play with. I really want to be able to take some amazing photos for me and my family to enjoy. So I have been reading and searching for info that would help. I think I've done almost everything short of paying for classes. My photos have been kind of a "hit-and-miss, hope-and-pray, formula of exposure. Kind of like playing Pin-the-tail-on-the-Donkey." I thought if I studied other photographers and their info they shared, like what distance, aperture, shutter speed, etc, I would learn the magic formula.
Well.... I was listening to one of my podcasts, Capturing Magic, and the host was talking to a couple that loves to travel to Disney Parks and share their wonderful photos they take, as well as trip reports/reviews. The Bricker's from Disney Tourist Blog. Now mind you, I really have not read this blog, and when I looked at it, it is not going to join my blog feed, because they travel so much and post about places I may never ever go...but want to go to. Just too overwhelming to me.
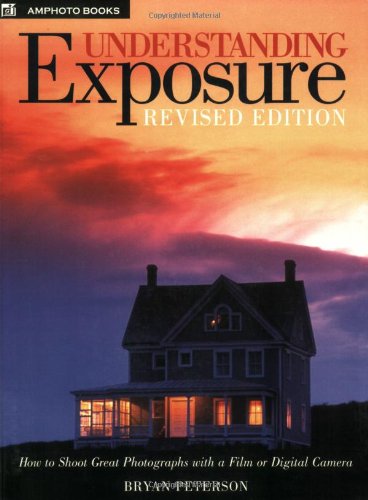
So, to get on with my story, Tom mentioned a book that he read that helped him in his photography skills. It is called "Understanding Exposure" by Bryan Peterson.
Well, here is what I learned:
Early on in the first chapter, he said that taking a photo is all about; setting your aperture, looking in your view finder, focus on your subject, and then adjusting your shutter speed until the camera's light meter indicates a "correct" exposure. Then take your picture and you did it!
WHAT?!!?!?!?
I understand what aperture is; how wide your lens opens up.
I can focus, after all most cameras auto-focus.
I know what shutter speed is; how long your shutter stays open.
BUT, what was that about a light meter?
I turned back to my camera manual and read....no light meter info. I did see where it showed something about an exposure level indicator in a diagram, but never did it explain it to me. I sat in my room and pondered over the thought, looked at everything....and tried pushing every button. Then I noticed one little tiny arrow....I rotated the dial, and then a line appeared, I lined it up with 0 and took a picture of my blind.....in manual mode....and it was correct!
WHAT! Why has no one ever said anything to me about that feature. My previous camera also had a manual mode, but I could never get it to work....well, now I know why.
Check out this next image.
This is what my manual showed. When looking in the view finder, I do not see all the little green lines, only one, or an arrow indicating which way I need to adjust.
The old camera had a 0.0 and it would change to a negative or positive number showing me which way to adjust my shutter speed. I never understood why it was showing different numbers. All I know is when trying to use manual mode, my photos never worked!

Okay, I'm showing you my blinds....why? because the exposure came out right!
Crazy, but what a AH-HA moment that was.
.JPG)
So here is a question, "Am I the only one who has ever tried to take photos in manual mode and not know there was a meter guiding me?" Because I feel that way.
Just a few other thoughts I want to share, or remember are:
APERTURE:
Small aperture (F/16, F/22, F/32) are for storytelling photos, photos with great depth of field. Lots of info.
Large aperture (F/2.8, F/4, F/5.6) are for singular theme photos, or isolation. Very shallow depth of field. This is a good area to use a telephoto lens.
Middle aperture (F/8, F/11) are for 'Who cares" photos. When it really doesn't matter what setting you use.
It is okay to use the Aperture-priority setting. You pick the aperture, and the camera will automatically select the shutter speed.
SHUTTER:
Fast shutter speed (1/250, 1/500, 1/1,000) will freeze action. Use when close to the action.
Slow shutter speed (1/60, 1/30, 1/15) is great for panning (see my attempt here)
Super slow shutter speed (1/4, 1/2, 1) will imply motion. Use this for waterfalls.
Super super slow shutter (longer than 1 second) are good for tail light streaks.
Bulb will stay open as long as it is pressed. (gotta try this for star trails)
As well, it is okay to use the Shutter-priority setting here. You pick the shutter speed, the camera selects the aperture.
ISO:
This still plays apart in digital photography, it is how sensitive the film (media) is to light.
Low ISO numbers are less sensitive, so are better in high-light settings, Big ISO numbers are more sensitive, so they are better in low light. However, the bigger the number the more noise or graininess the image will be.
FOCUS:
I'm still working on understanding this, but using Manual focus will help in storytelling mode to make the full image in focus. That or use a distance setting, which I have NO idea about.
LIGHT:
this is important, and I've known this for some time...I actually have the Golden Hour bookmarked, even if I don't think it is accurate for my mountainous home. :) In short, one hour after sunrise and late afternoon into the evening are best for using light in your photos. When the sun is overhead it will cause harsher shadows. Overcast skies are also good light.
MAKING Bokeh:
This is something I think is cool. I didn't even know what the word was, but heard it plenty on the Capturing Magic Podcast.
Aperture needs to be open all the way (F/2.8) to make circles. Any smaller opening, and hexagons will appear, since the distorted light takes on the shape of the lens opening.
More on METERING:
I mentioned earlier that using either Shutter-priority or Aperture-priority will work, but sometimes what the camera selects is not right. That is where manual is a must. An examples is taking pictures of snow. Too much white will make the camera choose a setting that is wrong and the snow will appear gray. There are a few ways of doing this, one is to take your meter off the sky. It is also good to take your meter reading off a field, horizon, wall, etc. Mr Peterson, author of the book above, has a fun chapter about the Sky Brothers and Mr Green Jeans. He shares that it is a good idea to try to meter the sky or the patch of green to get a correct meter reading, then focusing back on your subject and fire away, not worrying what your exposure meter is telling you.
Really quick, the times to look to the sky are, sunny days, back lit images, scenes at dusk, and along the coast (however, the watery reflection works).
OTHER IDEAS to remember:
Trying to get a photo of the Moon rising? Take it the day before the full moon.
Night photography, try keeping the ISO low to keep crisp pictures, use bulb. Bracket photos. Ex: try 2 seconds, if it is too dark, try 4 seconds, etc...
When shooting people, keep a low F# and kneel down to get a full length picture.
An idea for late dusk would be to open aperture wide open to get the meter reading (from the sky) and then changing it down to a small aperture and adjusting your shutter speed that same amount of stops.
Use a Tripod!
Here are a few picture I have taken in Manual Mode. Not the best, but I controlled everything about these shots and they look half decent.


Well, if anyone is reading to this sentence, I'm impressed...that was a lot of rambling by me. I just need my thoughts down! and hopefully they continue to help me as I learn and perhaps help someone else along the way. THANKS
Now, I'm off....it is another fee free weekend in our National Parks and I hope to be able to spend a little time there with my new knowledge.
I read it all! And your photos are GREAT!
ReplyDeleteMom